
Pull up a chair (if you can find one) and let's chat for a few minutes. Do you have every intention of making that something special but when you do sit down the mess overtakes you? So you start cleaning up the mess and before you know it; you don't have any time left to make what you were going to make. You are not alone! I am going to start a series how I beat the mess! (Yes, it is still ongoing.) I see all these perfect craft spaces online and think....what does it really look like after a day of crafting?
TIP 1: MINDSET: EVERYTHING HAS ITS SPACE If you return the supply to its space; you always know where it is. Then you have less mess. The reality of that is that we finish a project in the nick of time and don't follow through with the "return it to its space". Be prepared to evolve your space as you get organized.
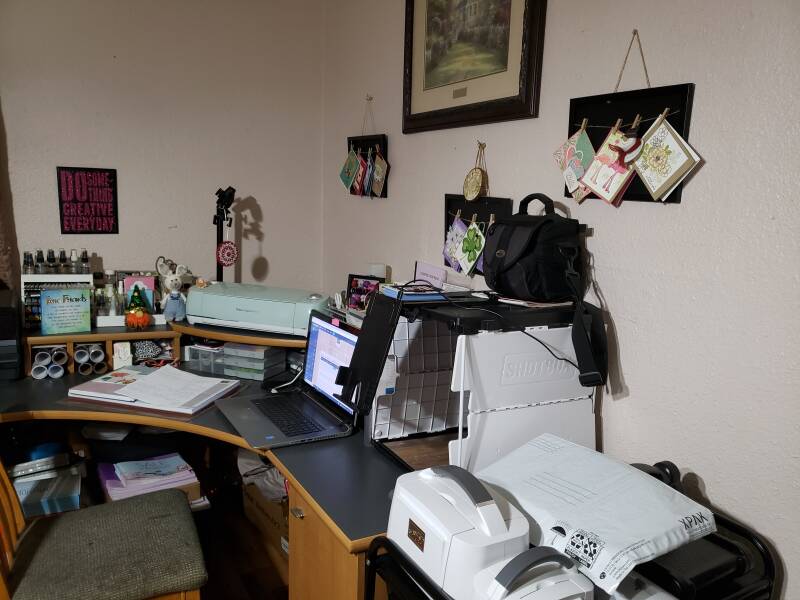
TIP 2: MAP OUT YOUR SPACE The biggest problem with this is that we outgrow our space. When you map it out; leave a lot of room to grow. As a military family, we moved several times which helped me map out and reorganize several times over the years. When we bought our forever home; I wasn't packing and unpacking anymore and I hit the "you outgrew your space" wall at the end of 2022. Let me tell you; it wasn't pleasant. After the Christmas rush of creating and gifting; I couldn't even find my desk. No joke! It took me a month of sorting and pitching a lot but I finally found my space again, oh yeah, and my desk.
A few things to consider when mapping out your creative workspace are:
1. What do you always use when you craft? Keep that in hands reach. The best way to achieve this is create something; what were you getting up to look for each time? That needs to be in your main creative workspace. For me I need my paper trimer, acrylic blocks, bone folder, Stampin Seal, glue dots, Stampin' dimensionals, paper snips and take your pick tool. For others it may be their Stampin' Blends or watercolors. This is all about you and what your crafting needs are. Really think about this and your creative space will become fully functional in no time at all. Don't overcrowd your main workspace; you need room to get creative.
2. What do you use often but don't have the room on your main workspace? Keep that in an alternate space near you, in a roll-away; another table or cabinet. Directly behind my main craft workspace are my inks, stamps and paper.
3. Storage: What type of storage do you have on hand to use? Does your storage utilize/organize your space efficiently?
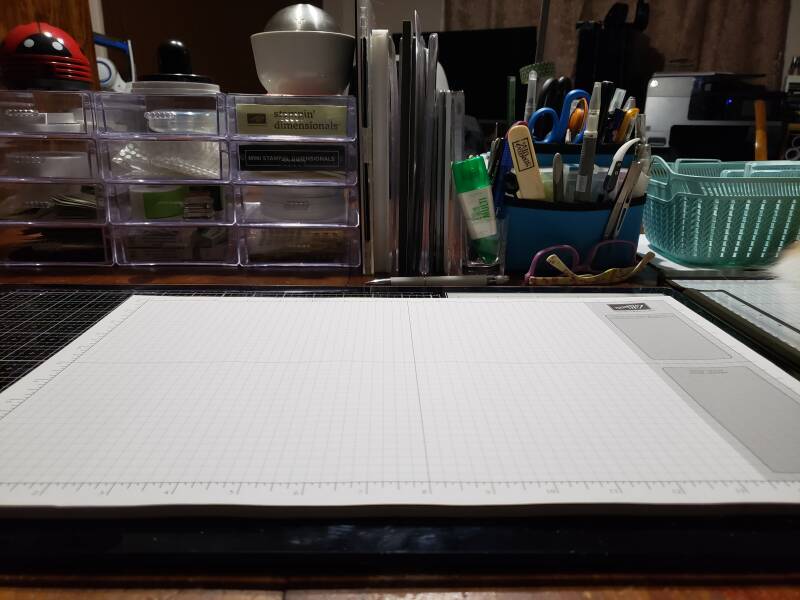
TIP 3: YOU DO YOU. Organizing is a personal thing and it has to feel right to you; not look perfect for pictures. If you find you don't have what you need when you start creating; rearrange your space so you are working smarter not harder. For example: I had a roll-away right next to me with all my adhesives and tools in it...but I was always losing my adhesive runner or dimensionals. I bought clear square drawers (I bought 12) at the Dollar Tree to put my Stampin' Seal, Stampin' dimensionals; embelishments; die cuts; etc. right in front of me on my main creative space. Something so simple was a game changer for me.
Map out your Creative space and I will post more in this series of Craft Room Organization next month.
Add comment
Comments
Love it!
Thank you, Judy!