Hello, my crafty friends and Happy Easter to you and your family! This week I am sharing the alternative cards I made from the March 2023 Paper Pumpkin Kit - Ten Years of Growth. I hope they provide inspiration for you to create from your kit. If you are interested in subscribing to the Paper Pumpkin kits you can subscribe to the monthly kit with several subscription options:
1 month subscription #137858
3 month subscription #137859
6 month subscription #137860
12 month subscription #137861
You can cancel any time you want as long as you do so before the 10th of each month. (The 10th of the month is also the deadline for subscribing for the respective months kit. Click on Paper Pumpkin in the menu above to see April's Kit.) This month's kit came with two stamp sets (one free for the 10th anniversary of Paper Pumpkin) All I can say is WOW! I went to town making sentiment strips even before I started my creative journey designing alternative cards. I had sooooo much fun with this kit! Let's get started with my alternatives for this month:
Alternative card one "Bay Window Card" was almost instantly designed by reverse folding the card so the printed window piece is on the inside of the card. I scored on the vertical bay window lines to create an actual bay window in the card. I cut 2 1/8" off the front of the card to create the gate fold look. I added a piece of Basic White cardstock to the right of the card measuring 2 5/8" X 5 1/2" scoring @ 1/2" on the short side. Then adhered the 1/2" scored edge to the back/right side of card base.
Then I cut four mat pieces at 5 1/4" x 1 7/8" for the front and inside mats.
I also ink blended the front pieces and cut them to 5" x 1 3/4" (need 4 pieces, 2 for outside and 2 for inside) Stamped sentiments on the inside and put the card together. I stamped a pot and designed it with Stampin' Blends and placed two plants from kit in the pot at the center of the bay window.
The belly band measurements are 8 1/2" x 1" adhered on the front with die cuts and embellishments for the card front.


I thought this card was pretty cool! Then, after I had created all my alternatives for this month's kit; I saw this card made by Rachel Tessman and just had to make it because I haven't made a card like this before. Her card is way cooler than mine! Rachel, thank you for your incredible alternatives!


My second alternative "Bookshelf Step Card" was made with the bookshelf card front. I had to do another fun fold with this, so I went to my template box and pulled out my step card templates. This is super simple Step card to make and gives a wow factor to the recipient.
First, I cut the card front right down the score line of the card base.
I cut a card base of coordinating cardstock measuring 4 1/4" x 11" scored at 5 1/2" on long side.
Then I cut a piece of coordinating cardstock (same as base) to 4 1/4" x 4" scoring on the 4" side @ 1/2", 1 1/2", 2 1/2" and 3 1/2" for the bottom shelf
Next, I cut a piece of coordinating cardstock to 4 1/4" x 3 1/2" scoring on the 3 1/2" side @ 1/2", 1", 2 1/2" and 3 for the second shelf.
Cut the card panel with the bookcase from the top to 2 7/8" x 4 1/8" (This will be the bulk of the bookshelf)
Cut the card panel with the bookcase from the bottom up to measure 1 3/8" x 4 1/8" making sure you keep as much of the bookcase as possible.
optional piece for the bottom of shelf cut to 3/4" x 4 1/8" (I kept mine blank so I can put a sentiment on it later.)
add plant and pot to second shelf and you have a beautiful step card!

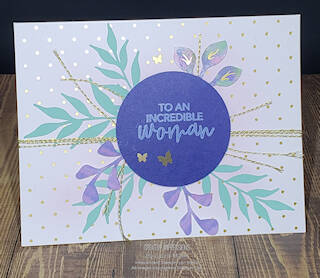
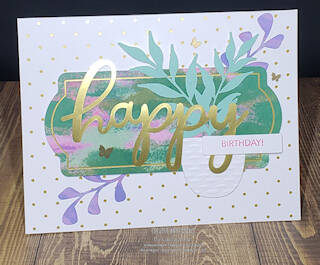
Before I show you the next four cards; I have to share the process with you. Remember, I told you I use everything from the kits? Well, here is an example of what I meant by that. I used the negative from the cutout plants and the shaped pieces by ink blending to create pieces to extend my kit. I even used the gold tissue paper on one of my cards this month.


I also looked through my dies to cut out ink blended scrap cardstock to create different pieces for my stamped pots. (You can always look through your stash to use what you have to create any of these cards.)


So after this creative process, I made the following beginner cards from the kit:


March 2023 Card Kit cards:


Add comment
Comments