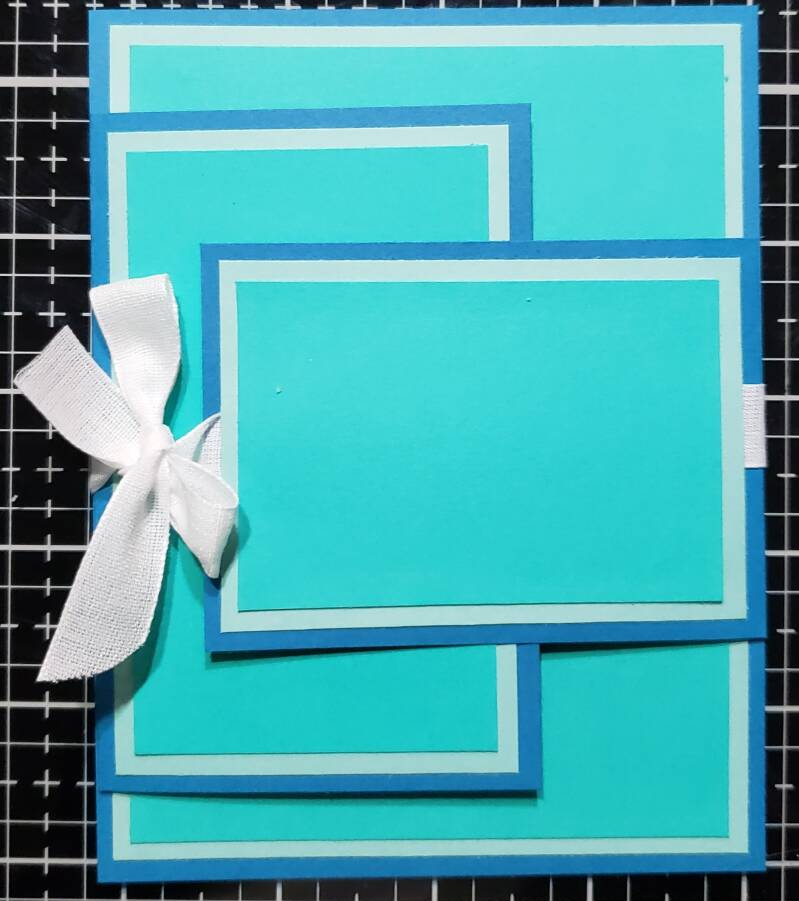
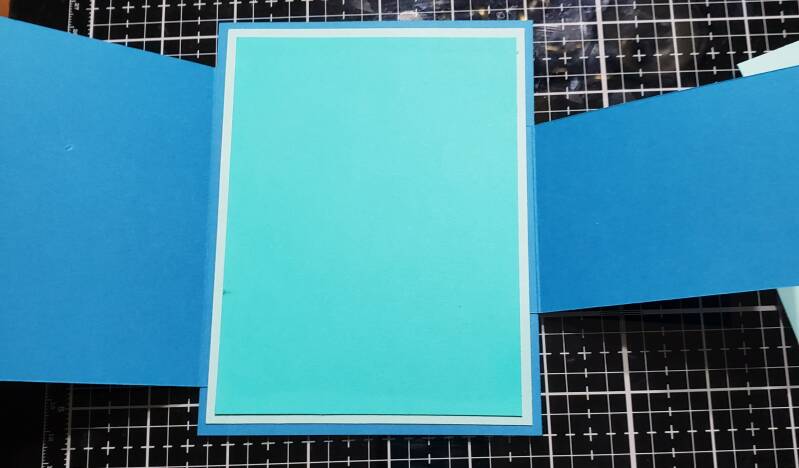
Fun Fold Friday is here! I know this is very plain because I haven't finished it; but what a fabulous fun fold! Below are all the measurements and instructions to complete this card.
Measurements and Instructions
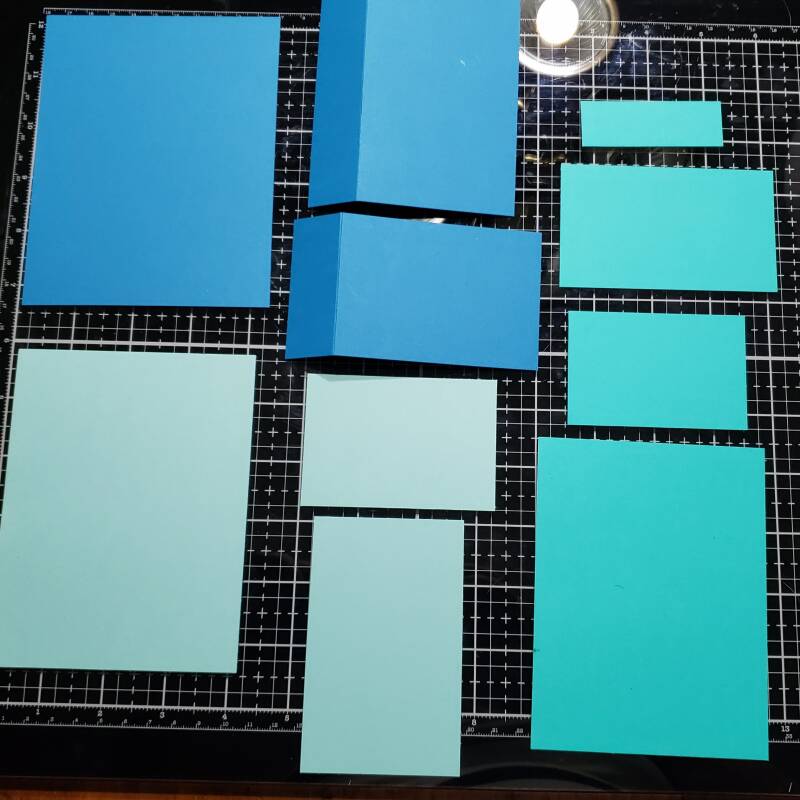
You will need 3 coordinating cardstocks OR 2 coordinating cardstocks and coordinating DSP (Designer Series Paper).
Cardstock #1:
5 1/2" x 4 1/4"
4 1/4" x 3 3/4" scored on short side at 1"
4 1/2 x 2 1/2" scored on long side at 1"
Cardstock #2:
5 1/4" x 4"
4" x 2 1/2"
2 1/4" x 3 1/4"
Cardstock OR DSP:
5" x 3 3/4"
3 3/4" x 2 1/4"
3" x 2"
7/8" x 2 1/2"
Basic White Cardstock:
4" x 2 1/2"
2 1/4" x 3 1/4"
Ribbon: 16"
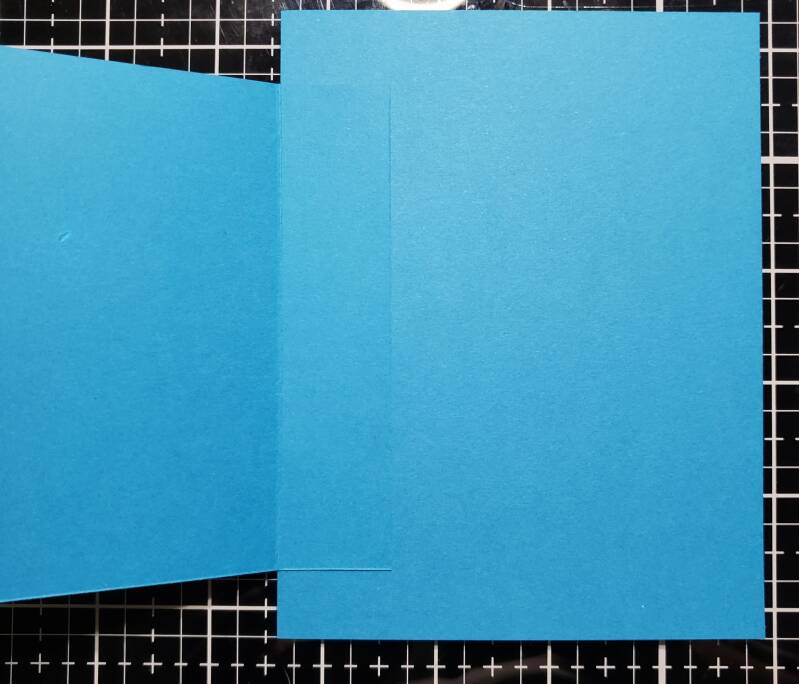
Step 1:
Fold and burnish the score line on the 4 1/4" x 3 3/4" piece and adhere it to the card as shown in picture. (Be sure to center the piece top to bottom)
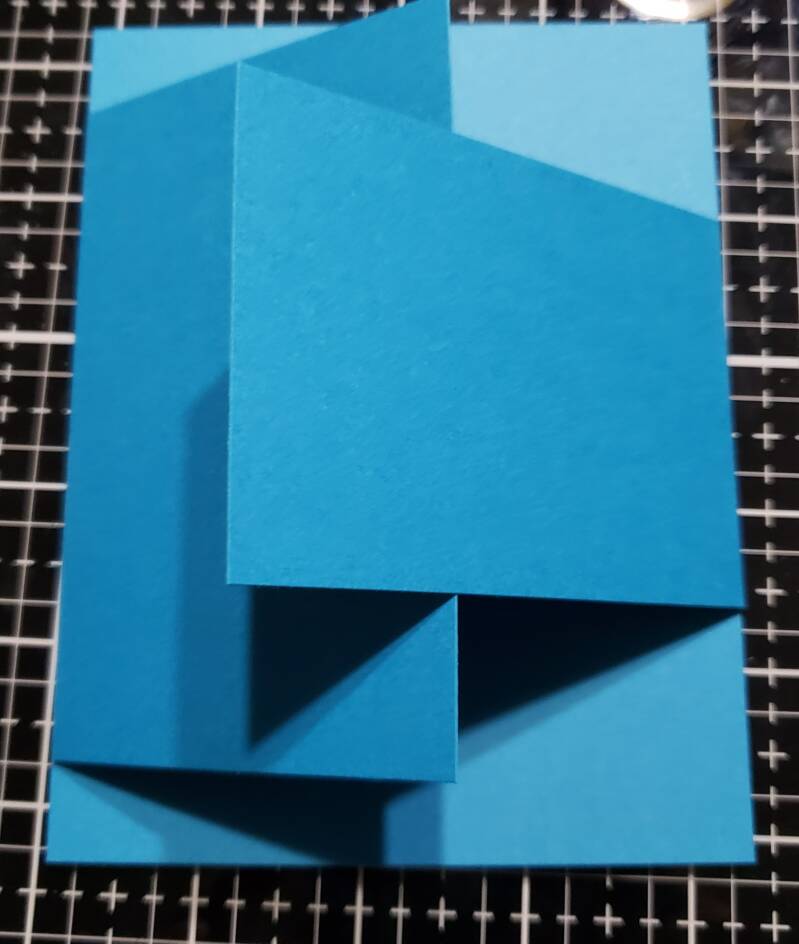
Step 2:
Fold and burnished the 4 1/2" x 2 1/2" piece and adhere it to the the right side of card as shown in picture. (Be sure to center the piece top to bottom).
Step 3:
Adhere cardstock #2 (5 1/4" x 4") piece to the center of the card; then adhere cardstock #3 (5" x 3 3/4") piece on top of Cardstock #2 piece as shown in picture. (stamp image prior to adhering to card and note the placement so it doesn't show when card is closed.) Now the seams of the added side pieces are hidden.
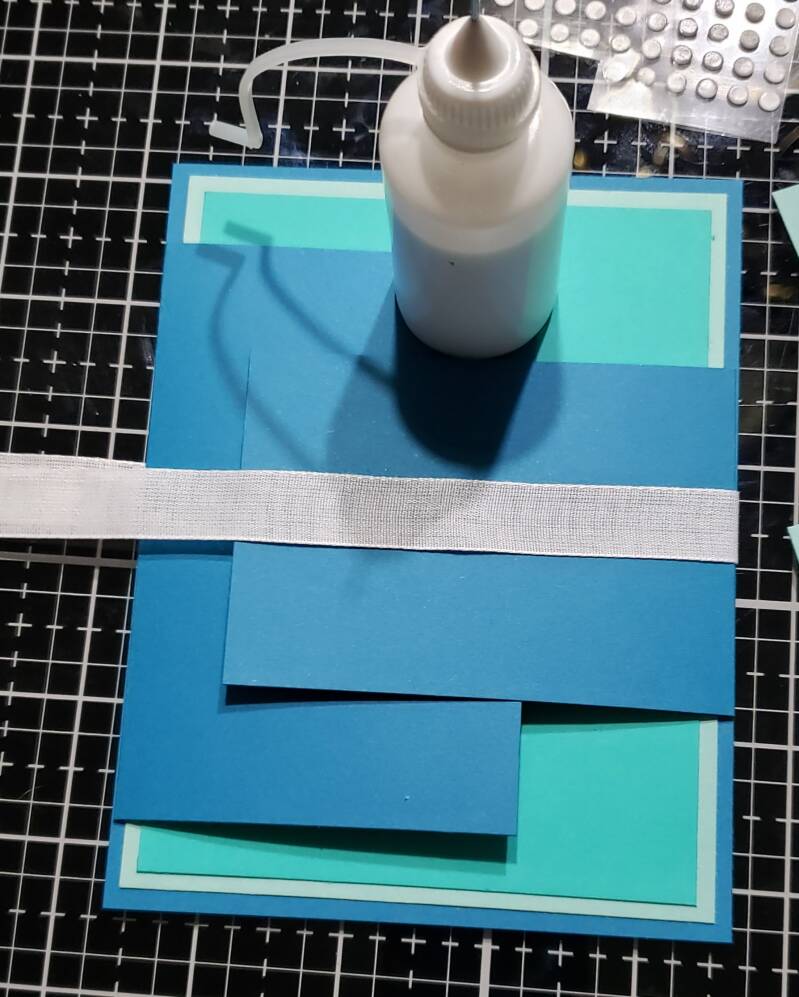
Step 4:
Now take your 16" of ribbon and wrap around card with the end towards the left. I usually secure both the back and front with one glue dot.

Step 5:
Add cardstock #2(4" x 2 1/2") and #3 (3 3/4" x 2 1/4") to the left panel as shown in picture.
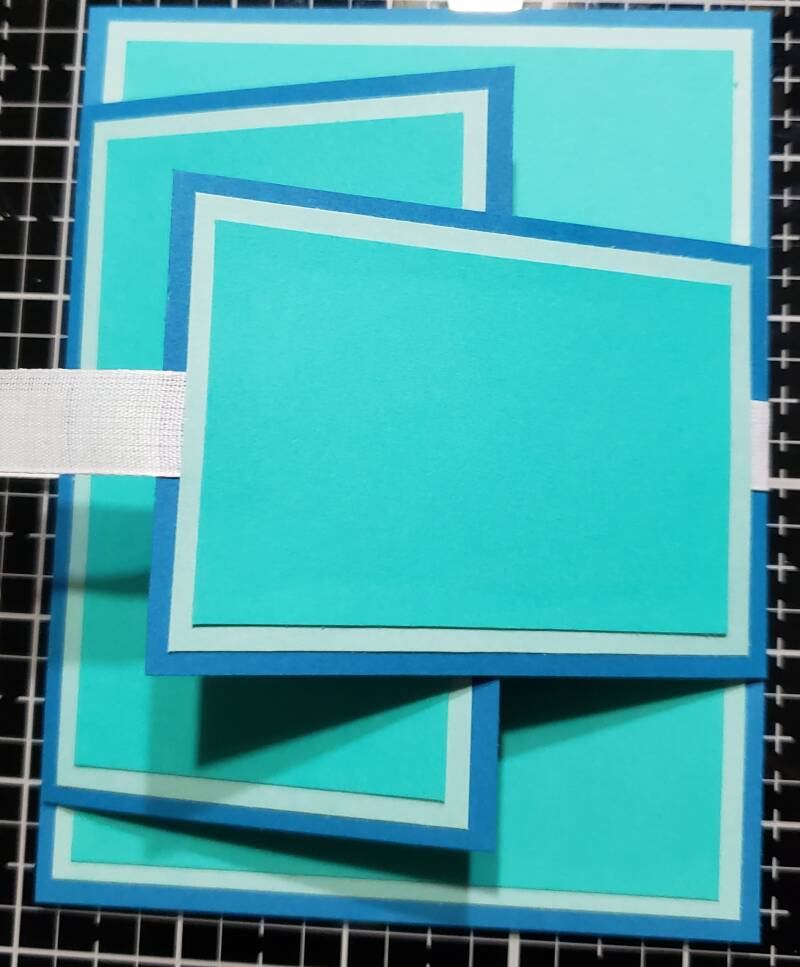
Step 6:
Add cardstock #2 (2 1/4" x 3 1/4") and Cardstock #3 (3" x 2") to the right panel as shown in picture. (Now your ribbon is secured by the layers.)
Add a greeting on the front right panel and you are finished. Wasn't that fun?


Add comment
Comments
Seems simple enough. I know it’s going to be beautiful when it’s finished. You ALWAYS make incredible cards!!